
|
|
Route |
|---|---|
|
|
38.89537°N / 120.0925°W |
|
|
Mountaineering, Skiing |
|
|
Spring |
|
|
Most of a day |
|
|
Class 3 |
|
|
Steep snow |
|
|
The Cross Couloir
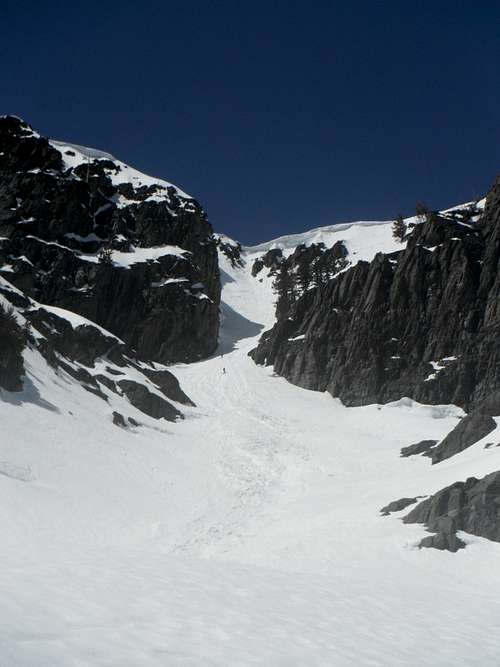
Looking up at the Cross Couloir on Mt. Tallac from a few hundred feet below the fun part. The "Black Buttress" is on the left.
The "cross" is formed by one steep central couloir which drops vertically from near the apex of the peak and "arms" formed by a broad ledge system that begins high on the left side of the peak and leads to the right at a downward angle. There is a large black buttress of near vertical rock which forms the left side of the route and separates the cross couloir from the crescent shaped descent route down the east facing slopes. You can of course descend almost any route from the summit.
This route is most popular as a serious ski descent, but it also a fun steep snow climb with a spectacular finish and amazing scenery. Because it is often skied, the snow is usually worked-over and avalanche danger has been mitigated, making for some great steep snow climbing.
This route is most popular as a serious ski descent, but it also a fun steep snow climb with a spectacular finish and amazing scenery. Because it is often skied, the snow is usually worked-over and avalanche danger has been mitigated, making for some great steep snow climbing.
It requires a little navigation to find the start from the hidden plateau and snow conditions can vary dramatically within a fairly narrow season, but that also means it's an adventurous climb that will not be crowded, and gets steeper and steeper right to the end, finishing off in 55-degree snow, skirting awesome cornices and offering spectacular views of beautiful Lake Tahoe.
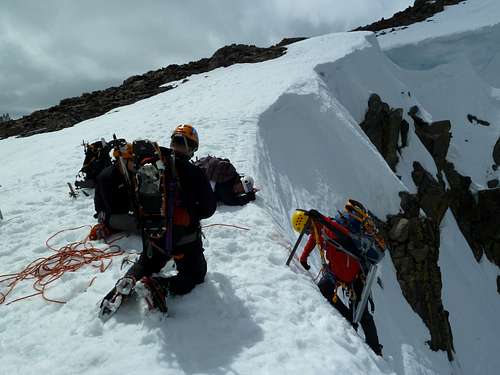
![Climbing out of the Couloir]()
Climbing out of the CouloirThe route proper begins as you gather at the foot of the Black Buttress to assess snow conditions and prepare for steeper terrain ahead. If you are a confident snow climber and secure in your technique you may want to just climb the couloir unroped. But usually this is where you'll want to rope up. Crampons and an ice axe will also be needed at this point, if not before. Strike out, staying to the left side of the couloir just off the rock wall. The best protection for the team is usually snow pickets, but an occasional rock piece can be also be placed. The route will continue to steepen and trend slightly left until it circles up to the plateau at the very top of the Black Buttress, skirting the threatening cornices hanging over the east face. A simple belay to your team is easy from here. The views are fantastic and the climbing is fun with an exhilarating finish. The summit is a short 5-minute walk north from there.
The Approach
The approach is a little tricky. There are a few ways to go, but the best is probably to begin at the "Spring Creek" neighborhood on the west shore of Lake Tahoe. To get there, follow Highway 89 north from Camp Richardson towards Emerald Bay, then turn left (west) on Spring Creek Road. It is the first left turn after the Baldwin Beach/Tallac Trailhead turnoff. Coming from the north, it is a right-hand turnoff just past the long Emerald Bay switchback.The gate to the neighborhood is usually locked. If so, just park as far off the road as you can and walk the paved mile. If you're lucky and it's not locked, follow Spring Creek Road up into the neighborhood and park somewhere unobtrusive. Walking or driving, always bear left at the forks until you get to "Yurok" road (and you do!) approximately 6522'. Please be respectful by giving the resident's homes and property a wide berth.
Once your run out of asphalt at the end of Yurok Road enter the forest and travel SSW, staying close to the east fork of Tallac Creek. You are aiming for a very narrow gap where this creek drops from a hidden plateau at approximately 7008' feet into the forest. Following this stream uphill is the best way to find this plateau because it is hidden from view owing to high ridges on all sides except for this elusive NE corner. Finding this gap is the key to the full elevation of the east face, and of course the most direct way back. If you study the topo route carefully, looking NE from the summit, you can see the east fork of Tallac Creek dropping in a mostly northeasterly line down the east slopes of Tallac into the 7008' plateau, through the gap in the NE corner, and down into the forest, joining the other forks and streams in the vicinity of the Spring Creek neighborhood.
If you have the right stream, the gap will be narrow enough that you will be forced to cross snow bridges over the creek more than once as you climb up to 7008'. Be careful and test all snow bridges before you commit to them. If you have navigated correctly you will be rewarded with a great view of the east face of Tallac with the creek cascading down the slopes.
From your vantage point out of the trees on the floor of the hidden plateau, the Cross Couloir is obvious and straight uphill. There are well over a thousand feet of snow to ascend still. Stay generally to the left of the creek while you work your way up. All the while, aim for the start of the Cross Couloir to the right of what I am calling the Black Buttress, the very steep and square shaped tower of dark rock dominating the upper slopes.
As you leave the last of the trees at the top the slopes, take the occasion to look to the left (south) of the Black Buttress, to the east facing slopes with it's many chutes and features. This is the best descent route, and there are many ways to go, but some of them are steep enough they may require rappelling or some sort of protection against an out of control fall. Pick a way that you can positively identify from the top on your way back down through here.
Climbing out of the Couloir
To descend, retrace your steps from the summit south past the couloir and the top of the Black Buttress to a wide crescent shaped bowl off the east side (left), which leads steeply down the east facing slopes. Drop into this bowl, staying close to the Black Buttress on your left, plunge-stepping the ramps and chutes until it rejoins the path of the ascent route somewhere just above or at the hidden plateau, depending on your preference. From there, continue back down through the gap and back to the car.
When To Climb
The optimal time of year to climb the Cross Couloir is only a few months long: late winter to spring. This would be approximately March - May, when there is enough snow to make the climb both interesting and safe. During this timeframe the snow will likely be stable enough that the avalanche danger is reduced and firm enough to make it fun with an axe and crampons. This route is not recommended in winter because of road closures and the very real potential for avalanche. Just take a look at the damage to the forest in the hidden plateau and you'll see that avalanches often roar down this way. It is not recommended after the snow is gone because then it is a very brushy and hot experience on loose talus and scree.March - May is also a great time to ski the couloir...but perhaps for those of us who like to both climb and ski, this route really shines as a spring climb that can be done it AT or telemark gear, with an enjoyable ski right back down the ascent route, or down the NE bowl, or down any of the east facicng chutes as well. Climbing this couloir puts you in a position to descend any route you desire off the east side, and I would submit is a lot more interesting than ascending Tallac via the usual NE ridge.
Recommended Gear
Personal Gear
- Typical water-resistant layers and gear for spring climbing
- 30-50 liter backpack
- Mountaineering boots or stiff, waterproof hiking boots
- Crampons compatible with your boots
- Lightweight helmet
- Lightweight mountaineering harness
- Mountain axe, and possibly a second tool for ease of climbing
- A few carabiners and slings
- Skis or snowshoes
- Trekking poles with snow baskets
Team Gear
- 8mm 30-meter dynamic rope, depending upon your team size
- 4-6 snow pickets
- Selective assortment of small cams and/or nuts
- 8 slings