
South Flank Route, Mount Howard
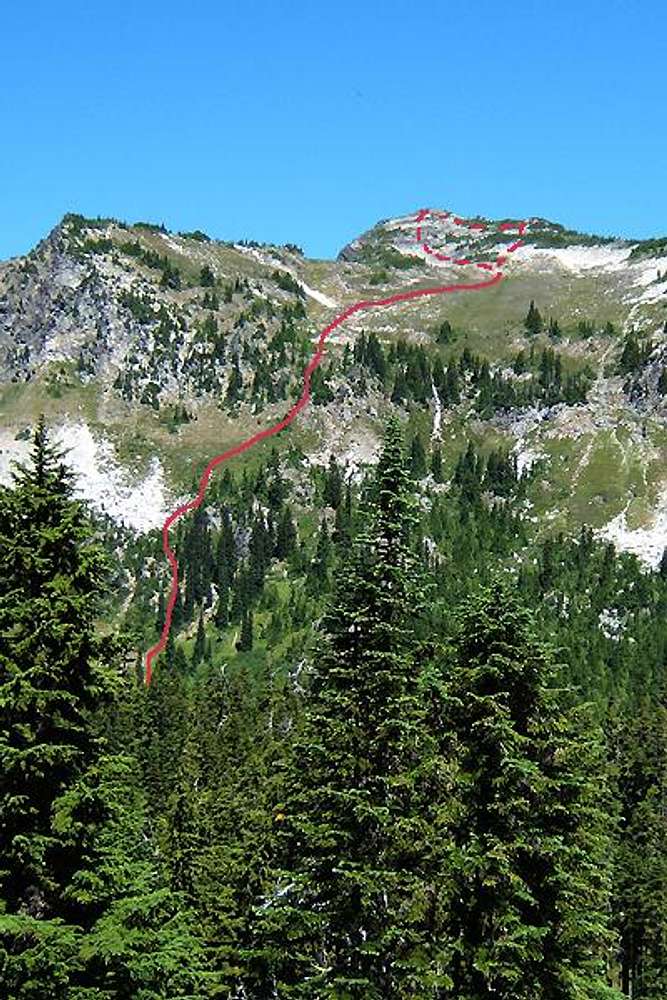
The South Flank route on Mount Howard. The solid line is how we went up to the big bench.
The left hand dotted line is the direct approach,
the right hand dotted line traverse to the SE ridge before going on to the summit.
Photo by Monica Spicker 27 July 2005.


